Today, I randomly felt like I should take apart my Razer Orochi gaming mouse to see what’s inside. I figured that if I’m going to take it apart, I should document it.
So I did.

The Razer Orochi is a laptop gaming mouse made by a company called Razer. They make a lot of gaming products like keyboards, mice and headsets. My brother has a bunch of Razer gaming devices (keyboard, headset and mouse) but this is my only Razer product that I own. The Orochi has a detachable micro-USB cord and also has Bluetooth support.
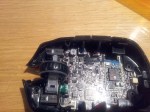
Looking inside, it appears that Razer definitely built this device to a price point. There are only 4 screws holding the device together (T6 Torx screws) and the rest are held together with plastic posts, with some components having the end posts melted to form a “weld” which might hamper repair efforts later if need be.
As for the electronics inside the mouse, there is a Freescale MC9S08JM60 8-bit HC08-architecture microcontroller, housing a 48 MHz CPU, 60 kB of program Flash memory, 4 kB of SRAM, 256 bytes of USB buffer RAM, a full-speed USB interface (12 Mbps), a real-time clock (I doubt that’s being used :)), an 8-pin keyboard interrupt module, and a few other peripherals expected of any general microcontroller (ADC, hardware serial interfaces, etc.). Bluetooth support is provided by a Broadcom BCM2042 module, which is advertised as being a single-chip device providing the HID (Human Interface Device) class and a full Bluetooth stack. It has its own 8051 8-bit CPU, 20 kB of internal SRAM, 8 kB of its own flash memory for configuration data, keyboard inputs, LED and LCD display drivers, quadrature decoders and a bunch of other features which are likely to be unused.
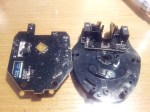
I was intending to replace the LEDs in the mouse (blue is such an ugly colour for LEDs) but it appears that the one on the mainboard is a red/blue bi-colour LED and the one in the scroll wheel is encased in plastic which has the end post melted in lieu of a screw.
Oh well, at least I was able to take a look inside this little piece of plastic and electronics.
-
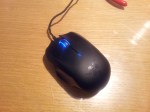
- Before the teardown
-

- Removing the battery door
-

- Batteries visible
-
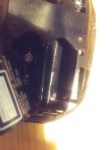
- Hidden screw…
-
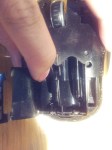
- Another hidden screw
-

- All screws visible
-

- Cover taken off
-
- Internal view
-

- Side parts removed
-
- Mainboard removed
-
- Scroll wheel
-

- Melted post construction – boo!