HDQ Utility version 0.96 now available!

Whew, I’ve been working on this version for quite a while. With the helpful feedback of many people that have tried my software, I’ve made a large number of improvements to the software; of course, there are plenty of features that aren’t implemented yet, but are being worked on.

More information about how this utility works can be found here.

Download HDQ Utility v0.96 here: https://www.dropbox.com/s/pf0vszgfei7s8ly/HDQ%20Utility%200.96.zip?dl=0

Updates

  • (Major improvement!) Improved HDQ logging functionality (logs are now saved to a separate file instead of being overwritten).
    • Example: “HDQ Log (2015-10-26 at 19.02.50) – HDQ Utility v0.96.txt”
  • Improved HDQ communication (HDQ breaks no longer require the serial port to be opened more than once, and HDQ no-response timeouts are decreased from 0.5 to 0.3 seconds.
  • Reworded certain error messages for clarity.
    • Example: “Communication error: Cannot read byte from address 0x02 (No response from device).” 
  • Renamed file ‘config.txt’ to ‘Config – COM Port.txt’ for clarity.
  • Improved state-of-health warnings by making them non-modal (they do not require the user to dismiss the message).
  • Added more notifications for unidentified and uninitialized batteries. (Uninitialized batteries are determined by a FULL ACCESS security state, with Impedance Track disabled.)
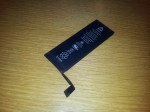
  • Fixed invalid device name and maximum load current readings for v5.02/sn27545-A4 based batteries (e.g. iPhone 6, 6+…).
  • Added time-to-full readings (for firmware older than v2.24).
  • Improved error-checking for device identification (it will display a notice that the tool may need to be restarted).
  • Updated DingoLib UI library to auto-resize window to 0.9x display resolution for improved readability on larger monitors.

To-Do

  • Create a dedicated section on my blog for the HDQ Utility.
  • Create a user’s manual describing the parameters displayed by the program (in particular, the Advanced Battery Information section).
  • Improve data logging functionality by saving logs to a subdirectory instead of the program’s root to decrease file clutter.
  • Improve error-checking for commands (retry reads if one or more bytes are not received from the device).
  • Add error statistics indicating how many communication errors occurred during data collection.
  • Improve support for older (older than v1.25) firmware.
  • Improve support for v5.02/sn27545-A4 devices (make use of advanced commands available in this firmware version).
  • Add support for restarting of data collection without having to re-execute the program.
  • Add Data Flash memory functions to allow for readout of advanced configuration, serial number, lifetime/black-box data, etc.
  • Rewrite this program in something that’s not LabWindows/CVI… also, use of a GUI rather than a non-console text UI.
Advertisement

(Day 3 and 4 of 4) Mini-Ramble: Dallas! TI! Batteries!

Oh wow, already a week since the event finished; I need to get posts written up more often!

Anyway, the last 2 days of the event were pretty much information seminars with three separate ‘tracks’ with one of them being all about fuel gauges (you can guess which one I went to 🙂 ). They discussed the reasons that fuel gauging is so important (and why “just measure the voltage” usually isn’t good enough), and also explained why your battery life just plummets after a few hundred cycles or 20% wear.

One of the main fuel gauge guys at TI gave me an evaluation board for their latest-and-greatest fuel gauge, the bq40z50. This gauge is able to handle 1-4 cells in series, which means that you can now pack a laptop battery’s smarts into a battery meant for a smartphone or tablet.

I’d post more but these few posts were “Mini-Rambles” after all. I may post a few pictures later on.

(Day 2 of 4) Mini-Ramble: Dallas! TI! Batteries!

Today was the first day of the actual Texas Instruments Battery Management Systems event. To my surprise, a couple hundred of people showed up from TI employees, a lot of customers (representatives from various companies like Bose, Google, and many others), and me as well. 🙂

The first day was a basic but still detailed introduction to the inner workings of Li-Ion technology as well as its limitations, failure modes (the gas coming from a Li-Po [lithium-ion polymer] cell contains carbon monoxide, hydrogen and a bunch of other gases), with this leading towards battery fuel gauges and why just measuring the voltage is not enough to accurately determine how full a battery is.

The day ended with a lab showcasing TI’s new Gauge Development Kit (GDK), which, in layman’s terms, is a “battery lab on a board”. It includes PC communication hardware, an adjustable charger, adjustable load and an on-board fuel gauge (but it’s set to use an external fuel gauge by default). I even got a chance to talk the TI battery management team, and even had a dinner with a few key TI guys including the one who made THE design for the GDK.

(Day 1 of 4) Mini-Ramble: Dallas! TI! Batteries!

Woohoo, travel time! Today marks the first day in Dallas attending Texas Instruments’ Battery Management Systems deep-dive seminar. Okay, technically it doesn’t start until tomorrow, but that doesn’t mean today was any less exciting.

The flight from Calgary to Dallas wasn’t too eventful, besides a controller fault that required going back to the terminal to resolve, but trying to grab a SIM card to put in my phone was a whole other ordeal. Fry’s carries the card but doesn’t carry the refill PINs, and my Canadian credit card would not work both online and on the phone; it was only when I went to Best Buy to purchase a refill card with cash that I was finally able to get cellular phone and data access.

I was also given a tour of the main TI facility, and boy it is HUGE! As much as I would have loved to share images, I signed an agreement explicitly stating I cannot do so. However, I was able to see a bunch of the lab rooms, offices and demo stands showcasing various TI technologies at work, such as the ARM processors in the Nest thermostat, the DLP chips in pocket projectors, and so on. I even got to see many of the people in the TI Battery Management team in person, but because of the seminar running from Tuesday to Thursday, they were visibly too busy with work to have a chat.

Tomorrow marks the first instalment of the Battery Management Deep-Dive Training sessions. There is preliminary word that I may have an opportunity to speak in public for a couple minutes about the TI forums and why I’m here.

Looking inside a (fake) iPhone 5S battery

Considering how popular the iPhone is, there’s always going to be some counterfeits out there. I’ve been out buying various iPhone batteries to build a database of each generation’s characteristics, but one model has eluded me so far: the iPhone 5S. The iPhone 5C’s battery that I bought appears to be genuine (but with its own issues), but none of the iPhone 5S batteries I’ve bought so far (4 of them at the time of writing this blog post) were genuine. All of these fakes look like a genuine battery at first glance, but all of them share a few common traits.

Battery teardown

The fake battery sports the usual iPhone battery information, complete with some dot-matrix printed data and a data-matrix barcode. It’s labeled with a capacity of 1560 mAh and 3.8 volts nominal voltage.

Comparison between real and fake iPhone 5S battery

Comparison between real and fake iPhone 5S battery

The connector itself has two points for soldering the connector to provide durability. However, with the fake batteries, they are not soldered down. The two spots on the ends of the connectors are dark with a small point visible inside it (that point is the reinforcement pin on the connector). If this connector is installed in an iPhone, it will probably not come out without either damaging the battery’s connector, or worse, leave the plastic connector piece inside the phone, requiring tweezers to remove.

Connector lifted off with a hobby knife

Connector lifted off with a hobby knife

iPhone 5S and 5C battery pinout

iPhone 5S and 5C battery pinout

Removing the black protective tape reveals an iPhone 4 battery fuel gauge board. The connector is soldered to this board, with four solder points visible.

iPhone 4 battery PCB with soldered-on flat flex connector

iPhone 4 battery PCB with soldered-on flat flex connector

Pulling out the PCB  reveals another characteristic of these fake batteries: the positive terminal is cut short, with another metal section being clumsily spot-welded to the stub on the cell.

Note how the battery tab is poorly welded to the PCB.

Note how the battery tab is poorly welded to the PCB.

Battery fuel gauge data

The battery fuel gauge requires proper programming to accurately indicate the battery’s charge status. Because of this, each iPhone battery generation has its own specific configuration.

The fake iPhone battery retains the programming for the iPhone 4’s battery, which is a designed capacity of 1420 mAh, using a bq27541 fuel gauge running version 1.25 firmware. The data inside it is often that of a used/recycled battery as well.

This data can be (partially) read out directly from the iPhone with a tool such as iBackupBot, but more data can be read if the battery is read with another tool. I have the EV2400 from Texas Instruments to read this out on a PC, but this data can be read out with a USB-to-TTL serial port, a logic gate (a logic inverter) and a small MOSFET transistor.

I created a small tool that uses this circuit to interface with the fuel gauge and read out its data. Check it out here.

Using my tool, this is the report for one of these fake batteries. Note how it is identified as an iPhone 4 battery. Don’t be fooled by the calculated state of health. It’s not accurate for this battery as the fuel gauge still thinks it’s still inside an iPhone 4 battery pack.


**** START OF HDQ BATTERY LOG REPORT ****
HDQ Gas Gauge Readout Tool version 0.9 by Jason Gin
Date: 9/30/2014
Time: 0:52:24
Serial port: COM26

Battery Identification
========================
DEVICE_TYPE = 0x0541, FW_VERSION = 0x0125, DESIGN_CAPACITY = 1420 mAh
Battery's configuration matches that of a standard iPhone 4 battery.

Basic Battery Information
===========================
Device = bq27541 v.1.25, hardware rev. 0x00B5, data-flash rev. 0x0000
Voltage = 3804 mV
Current = 0 mA
Power = 0 mW
State of charge = 45%
Reported state of health = 0%
Calculated state of health = 99.3%
Cycle count = 14 times
Time to empty = N/A (not discharging)
Temperature = 27.9 °C (80.3 °F) (3009 raw)
Designed capacity = 1420 mAh
Heavy load capacity = 628/1410 mAh
Light load capacity = 673/1455 mAh

Advanced Battery Information
==============================
Capacity discharged = 0 mAh
Depth of discharge at last OCV update = ~778 mAh (8768 raw)
Maximum load current = -200 mA
Impedance Track chemistry ID = 0x0163
Reset count = 11 times

Flags = 0x0180
Flag interpretation:
* Fast charging allowed
* Good OCV measurement taken
* Not discharging

Control Status = 0x6219
Control Status interpretation:
* SEALED security state
* SLEEP power mode
* Constant-power gauging
* Qmax update voltage NOT OK (Or in relax mode)
* Impedance Track enabled

Pack Configuration = 0x8931
Pack Configuration interpretation:
* No-load reserve capacity compensation enabled
* IWAKE, RSNS1, RSNS0 = 0x1
* SLEEP mode enabled
* Remaining Capacity is forced to Full Charge Capacity at end of charge
* Temperature sensor: External thermistor

Device name length = 7 bytes
Device name: bq27541

**** END OF HDQ BATTERY LOG REPORT ****

Mini-Ramble: I’m one of TI’s Community Members of the Month!

Yesterday I received a nice little email from The Texas Instruments E2E Community team. I was chosen as their Member of the Month of their analog electronics forum, specifically the battery fuel gauge section (of course!).

CaptureTI is sending me a Fuel Tank BoosterPack for their Launchpad microcontroller development platforms. It includes a 1200 mAh lithium-polymer battery, a bq27510 fuel gauge, and a bq24210 lithium-ion charger, all on one board. They’ve also offered me the opportunity to write a post on their power management blog, Fully Charged, regarding this little board. When I receive it I’ll definitely be taking a closer look at it.

Thanks, Texas Instruments!

Convenient chips, inconvenient packages: Making use of the Texas Instruments bq27421-G1 lithium-ion battery fuel gauge chip

As seen on Hackaday!

I ordered some sample chips from TI a few weeks ago, most of them being lithium-ion battery “fuel gauge” chips. These chips are used in electronic devices to determine exactly how much energy is in the battery, and if the chip’s sophisticated enough, provide a “time until empty” prediction.

The bq27421 from TI is packaged in a tiny 9-ball grid array, packaged as a wafer-level chip scale package (WLCSP). This means there is no epoxy covering like normal ICs, making for a compact design that’s a good thing for space-constrained applications like modern cell phones. I’ll talk about this chip later on in this post.

The tiny BGA package means that prototyping with these chips is difficult if not impossible, depending on how large the chip is that you’re working with. The bq27421 is about 1.6 mm x 1.6 mm, which is less than 1/3 of the size of a grain of rice. No way you’d be able to put that on a breadboard… right?

2013-06-14 15.51.58Well, you can, with a small breakout board, some magnet wire, epoxy (a bigger deal than you might initially think), patience and steady hands. I mounted the chips in what I call a mix between dead-bug (where the contacts face up as if the chip was like a dead bug on the ground) and chip-on-board construction (where the chip is glued directly to a board, wire-bonded and then covered in epoxy). I used some SOIC-to-DIP boards from DipMicro Electronics (link). I often use these boards when doing work on prototyping board since using these surface-mount parts reduce the board’s height compared to using actual DIP packaged chips (which are much less common for modern ICs anyway).

The chip is first affixed to the breakout board using a small amount of epoxy and allowed to cure for several hours. The epoxy, from what I’ve found, is crucial to your success; superglue and other adhesives won’t stand up to the heat of a soldering iron, and if it loosens you can end up ruining your chip and wasting your time spent working on it.

After letting the epoxy cure, I then prepare the bond pads around the chip. I place a liberal amount of solder on each pad to allow easy connection with the iron later; I want to minimize the stress on the tiny 40-gauge magnet wire because once the connection is made, the solder ball that the chip came with won’t be as easy to solder to the second time around.

Next up is the actual soldering process. I created a pinout for the board in PowerPoint to help plan out how I’ll solder the wires. After tinning a long length of 40-gauge magnet wire, I then solder the wire first to the solder ball on the chip, then solder the other end to the pad I previously put solder on. To minimize the stress on the wire afterwards, I use a small utility knife to cut the end of the wire where the pad is. I then complete this for the rest of the contacts. This took me an hour and a half the first try, but took me about 20 minutes the second time around. Also, for my second try, for the BAT and SRX pins, which carry the full current for any loads connected, I used 30-gauge wire-wrapping wire to allow a bit more current-carrying capacity. It probably is overkill since the maximum current rating for the bq27421 is 2 amps continuous, but I felt a bit more at ease connecting the pins this way.

After checking for short and open circuits with a multimeter I then placed headers onto the board and put it into my “evaluation board” that I created just for this chip. Using an EV2400 box from TI, used to connect to their vast range of battery-management chips, I connect the box to my PC and run their GaugeStudio software to verify that the chip works.

… and it does, like a charm! I was able to communicate with the chip and also view its operation in real-time.

One thing that was causing me trouble before was that after removing the battery and putting another one in, I found that the gauge chip sometimes wouldn’t be recognized by the PC. Being unsure why it was doing this, I dug through the reference manual, and found one tiny part in the manual that showed me why it wasn’t working consistently.

gpoutThe GPOUT pin was left floating on my board, and the chip requires a logic high signal before it starts up. This brings back memories of my digital electronics class in college; these floating inputs can cause all sorts of trouble if you’re not careful, and in this case, it was mentioned only once in the reference manual. After using a 1 megohm resistor to pull up the pin, the chip worked flawlessly. Now that I verified that the chip was working, I mixed up some more epoxy and covered the chip, making sure that the bond wires and chip were covered to prevent damage.

After all that, I had a couple working highly-advanced battery gauges that I could fool around with, and also learned a couple things about deadbugging SMT components and also the basics of chip-on-board construction.