Tutorial: Recovering Cookie Clicker saves from an offline installation/backup of Google Chrome

Update (August 29, 2018): Turns out cleaning out your cookies/cache will erase your Cookie Clicker save. Who would’ve thought…

Cookie Clicker saves: You don’t realize the importance of saving your progress until you lose your save data. A few days ago I opened Chrome to my always-running instances of Cookie Clicker, but found that all of my progress was deleted (and it was showing a “Don’t forget to back up your save” message just to add insult to injury).

My heart sank when I realized that one of my runs, over three years old, had suddenly vanished into thin air. I tried restoring Google Chrome’s data via a Shadow Copy; no dice. I tried using my Windows Home Server 2011 backups, but realized that it would take over an hour to restore my Chrome folder. After much frustration, I decided to retrieve and examine Chrome’s Local Storage folder and see whether I could retrieve my save files that way – and it worked! Here’s how to recover your own Cookie Clicker saves…

Retrieving an older version of Google Chrome’s data folder

If you have Shadow Copy (aka Previous Versions) enabled, you may be in luck if the restore point(s) available have intact game save information. If you have an offline backup solution, that may be usable as well. If you have neither, you could try it on your current Chrome installation but your chances of recovery are much slimmer.

For Windows, Google Chrome’s default Local Storage folder located at: %USERPROFILE%\AppData\Local\Google\Chrome\User Data\Default\Local Storage

There will probably be a large number of files ending in .localstorage and .localstorage-journal – these are unlikely to contain your saves, and if they are present, they will be many months out of date; Google has begun storing websites’ local storage in a LevelDB database. The database in question is stored in a folder called leveldb.

If you are attempting to retrieve the data from a current Chrome installation, close Chrome before continuing.

Copy this “leveldb” folder to another (safe) location as to avoid any accidental overwrite of the database while trying to recover the game saves. Download and install the FastoNoSQL database browser software (it’s a trial, but for our purposes it will do just fine – just follow the registration instructions and you can whip up a temporary email address if you need to).

Browsing the LevelDB database

When FastoNoSQL is opened for the first time, the Connections window will appear. Click the “Add connection” button (it looks like a green button with a + symbol on it); even though we’re just browsing some database files, it’s considered to be a “connection” to the database. Select “LevelDB” and choose the folder that holds the “leveldb” folder that was previously copied.

Once the database is opened, note the number of database keys (in my case it was 1212), right-click the “default” database in the Explorer tree on the left-hand side of the FastoNoSQL window, and select “Load content of database”. Enter the number of keys previously noted into the “Keys count” field, then click OK.

In the “Search…” box, enter this text (select all the text in this box):

\\x5f\\x68\\x74\\x74\\x70\\x73\\x3a\\x2f\\x2f\\x6f\\x72\\x74\\x65\\x69\\x6c\\x2e\\x64\\x61\\x73\\x68\\x6e\\x65\\x74\\x2e\\x6f\\x72\\x67\\x00\\x01\\x43\\x6f\\x6f\\x6b\\x69\\x65\\x43\\x6c\\x69\\x63\\x6b\\x65\\x72\\x47\\x61\\x6d\\x65

This cryptic-looking text is a hexadecimal-escaped version of the string _https://orteil.dashnet.org, an SOH (Start of Header) character, and CookieClickerGame.

If your saves are found, you will see one or two entries, depending on whether or not the normal and/or Beta saves are present. The first entry will be the normal version of Cookie Clicker, and the second one, with a slightly longer key (ending in “\x42\x65\x74\x61”) is the for the Beta. Right-click the desired entry and choose “Edit…” to view the game save data. Copy the contents of the “Value” field into a text editor (Notepad, etc.), and delete the very first character before “Mi4w” – this is an SOH (Start of Header) character and we don’t need it to restore the game save. Save this text file so you have a backup of your game save, and import the file into Cookie Clicker (either by copy-pasting the text or using the “Load from file” button).

The game save should look like this (look for the bolded characters to ensure the game save data is intact):
Mi4wMDQ1fHwxNTI [... text omitted ...] OkwoDCgAR8%21END%21

If everything works out, your Cookie Clicker game save should be restored from the brink of destruction!

Advertisement

Completed: Self-discharge test of Kentli PH5 1.5V Li-ion AA (Part 6)

Looking for the teardown or how well the Kentli PH5 battery performs under load? Click the links to learn more.

It’s finally happened – the self-discharge test of the Kentli PH5 Li-ion AA battery has finally come to an end… and it only took almost 3 years!


april 29 2018 stats

Kentli PH5 self-discharge test statistics

Self-Discharge Rate

I never anticipated this test would run for so long; although the PH5 did not have a manufacturer-specified self-discharge rate, marketing materials suggested that the batteries had a storage life that was “3-5 times longer than Ni-MH batteries”. Wikipedia states that after one year, normal Ni-MH batteries lose about 50% of their capacity, and low-self-discharge (LSD) Ni-MH batteries lose 15-30%.

Correlating this with the data collected from the Texas Instruments bq27621-G1 fuel gauge, the battery lost 40% of its charge within one year, placing it in between the standard and LSD Ni-MH chemistries. Using Excel’s SLOPE() function, the self-discharge rate was calculated to be 0.10108%/day.

Experimental Improvements

There is some error in State of Charge measurement when using the bq27621 fuel gauge. As it uses the Impedance Track algorithm, open-circuit voltage is used to determine a battery’s state of charge upon gauge initialization. This OCV curve is chemistry-specific, with slightly different formulations requiring different chemistry ID codes. The bq27621 has a fixed Chemistry ID of 0x1202 (LiCoO2/LCO cathode, carbon anode), but experimental data revealed a better-matched Chemistry ID of 0x3107, 0x1224 or 0x0380; the first two chemistries pointed towards a LiMnO4/LMO cathode chemistry which I was somewhat skeptical of, but did not test further.

Using another gauge with a different, programmable Chemistry ID could have led to a straighter SoC curve. This wouldn’t be too difficult to reproduce, as the battery voltage can be fed to the gauge in order to recompute the state of charge. Additionally, the bq27621 has a Terminate Voltage of 3.2 volts (the gauge considers this voltage to be the point in which it reads 0% SoC), which is higher than the battery’s protection voltage of 2.4 volts (granted, there is very little charge difference in this area of the discharge curve).

My test setup was not temperature-controlled; I live in a house without air conditioning and room temperatures can vary from 15 to 35 degrees C (59 to 95 degrees F), depending on the season. However, I doubt that this would have had too much impact on discharge rate, and this would better represent real-life scenarios where a constant temperature may not necessarily be guaranteed.

Finally, this test was performed on a new, uncycled battery. I suspect the discharge rate would be significantly higher on an aged battery that was subject to a lot of charge cycles and day-to-day wear.

Conclusion

This was the longest-running experiment I’ve ever conducted on this blog. The Kentli PH5’s self-discharge rate lasts longer than a standard Ni-MH battery, but a LSD (low-self-discharge) Ni-MH battery would still last longer, albeit with a lower terminal voltage. The battery, when new, should be expected to last almost 3 years without a charge (although there won’t be any charge left by then); it will hold about 60% of its capacity after 1 year of storage.

To download a copy of the self-discharge test data, click here.

eMMC Adventures, Episode 2: Resurrecting a dead Intel Atom-based tablet by replacing failed eMMC storage

As seen on Hackaday!

Recently, I purchased a cheap Intel Atom-based Windows 8 tablet (the DigiLand DL801W) that was being sold at a very low price ($15 USD, although the shipping to Canada negated much of the savings) because it would not boot into Windows – rather, it would only boot into the UEFI shell and cannot be interacted with without an external USB keyboard/mouse.

The patient, er, tablet

The tablet in question is a DigiLand DL801W (identified as a Lightcomm DL801W in the UEFI/BIOS data). It uses an Intel Atom Z3735F – a 1.33GHz quad-core tablet SoC (system-on-chip), 16GB of eMMC storage and a paltry 1GB of DDR3L-1333 SDRAM. It sports a 4500 mAh single-cell Li-ion battery, an 8″ 800×1200 display, 802.11b/g/n Wi-Fi using an SDIO chipset, two cameras, one microphone, mono speaker, stereo headphone jack and a single micro-USB port with USB On-The-Go support (this allows the port to act as a USB host port, allowing connections with standard USB devices like keyboards, mice, and USB drives).

Step 1: Triage & troubleshooting

The first step was to power on the tablet to get an initial glimpse into the issues preventing the tablet from booting. I was able to confirm that the eMMC was detected, but did not appear to have any valid MBR or file system; therefore, the UEFI firmware defaulted to entering the UEFI shell (which was of little use on its own as there is no on-screen keyboard available for it).

DSC_2191

DigiLand DL801W with UEFI shell

However, one can immediately notice there is an issue with the shell: how do you enter commands without an on-screen keyboard? The solution was to use a USB OTG (On-The-Go) dongle to convert the micro-USB type B port into a USB type A host port.

Using the shell commands, I tried reading the contents of the boot sector, which should end with an MBR signature of 0x55AA. Instead, the eMMC returned some nonsensical data: the first half of the sector had a repeating byte pattern of 0x10000700,  and the second half was all zeroes (0x00) except the last 16 bytes which were all ones (0xFF). The kicker was that this data was returned for every sector I tried to read. No wonder the eMMC was unbootable – the eMMC had suffered logical damage and the firmware was not functioning correctly.

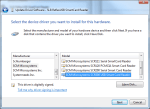
After creating a 32-bit Windows 10 setup USB drive (these cheap low-RAM PCs often use a 32-bit UEFI despite having a 64-bit capable CPU), I opened Hard Disk Sentinel to take a deeper look at the condition of the onboard eMMC.

DSC_2198

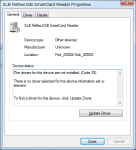
Malfunctioning Foresee 16GB eMMC visible in Hard Disk Sentinel

The eMMC identified itself with a vendor ID of 0x65, and an MMC name of “M”. It reported a capacity of 7.2 GB instead of the normal 16 GB, another sign that the eMMC was corrupted at the firmware level.

DSC_2199

Foresee 16GB eMMC returning corrupted data

Using HDS, I performed a read scan of the entire eMMC despite its failed condition. The read speeds were mostly consistent, staying between 40 to 43 MB/s. A random read test revealed a consistent latency of 0.22 ms.

In order to assess whether the eMMC was writable in its current state, I ran a zero-fill and subsequent read scan. The eMMC appeared to accept writes but did not actually commit them, as HDS threw verification errors for all sectors.

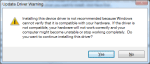
After the tests in HDS, I decided to attempt an installation onto the eMMC to assess its writability. Windows Setup failed to create the disk partition structures, throwing an error message reading “We couldn’t create a new partition or locate an existing one”.

Step 2: Teardown & eMMC replacement

Since the onboard Foresee NCEMBS99-16G eMMC module was conclusively determined to be faulty, there was no point keeping it on the tablet’s motherboard. This also provided an opportunity to upgrade the eMMC to a a larger and faster one. Since this required the tablet to be disassembled, I decided to do a teardown of the tablet before attempting to replace the failed eMMC module (the teardown will be in a separate blog post when the time comes).

After removing the insulating plastic tape on the bottom of the PCB, I masked off the eMMC with some kapton tape to protect the other components and connectors from the heat of my hot-air rework station. With some hot air and patience, the failed Foresee eMMC was gone. This also revealed that the eMMC footprint supported both the 11.5×13 mm and 12×16 mm sizes, but the 12×16 mm footprint did not have the extra 16 solder balls for reinforcement (most eMMC balls are unused so their omission had no negative functional effect).

DSC_2215

Foresee eMMC removed from DL801W’s motherboard

Instead of a barely-usable 16 GB of eMMC storage, I opted to use the Samsung KLMBG4GEND-B031 – a 32 GB eMMC 5.0 module. This chip boasts more than 2000 IOPS for 4K random I/O, which should be a boon for OS and application responsiveness.

DSC_2219

Replacement Samsung KLMBG4GEND-B031 eMMC installed

A little flux and hot air was all I needed to give the 32 GB eMMC a new home. Time to reassemble the tablet and try installing Windows 10 again.

Step 3: OS reinstallation

After spending a few minutes cleaning the board and reinstalling it in the tablet, it was time to power the tablet back on, confirm the presence of the new eMMC and reattempt installing Windows.

DSC_2221

Installing Windows 10 from USB drive via USB-OTG adapter

The eMMC replacement proved to be successful; within minutes, I was off to the races with a clean installation of Windows 10.

Conclusion

DSC_2223

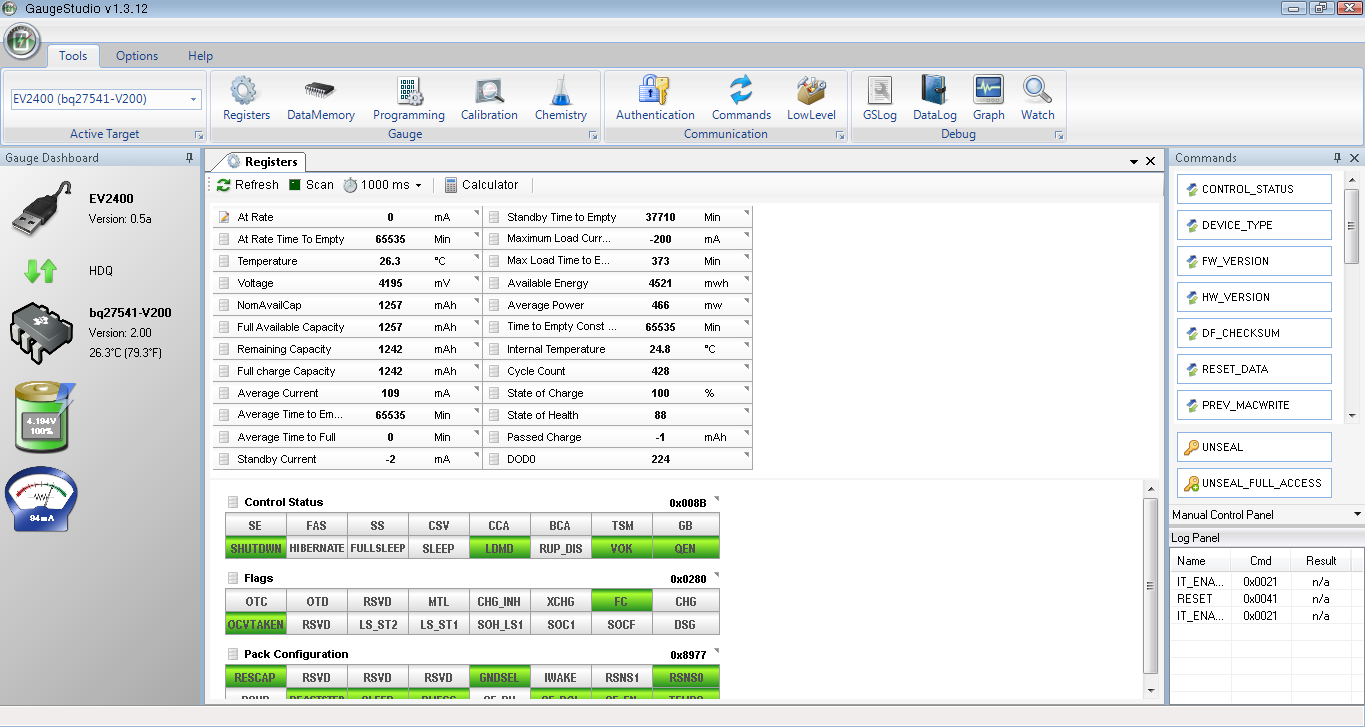
DL801W restored, running Texas Instruments’ bqSTUDIO software

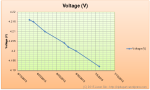
This was a pretty fun project. With some electronics and computer troubleshooting skills, I had a tablet capable of running desktop Windows programs. Its low power consumption and USB host capabilities made for a great platform to run my Texas Instruments battery hardware and software without being tethered to my desktop.

However, I was not finished with this tablet. The 1 GB of onboard RAM made Windows painfully slow to use, as the CPU was constantly bogged down performing memory compression/decompression. The 32GB of eMMC storage I initially installed began feeling cramped, so I moved to a roomier 64GB (then 128GB) eMMC.

I won’t go into the details of how I upgraded the RAM in this post, as it’s a long story; simply put, soldering the RAM ICs was the easy part.

WordAds Adventures, Episode 3

Another month has passed and that means another round of ad revenue trickling in.

Results for January 2018

This is rather interesting – despite getting more views than December 2017, the pay rate was lower than before!

Curious to see what the dollar-per-impression rate was for each month, I tabulated the results and graphed them:

Period Earnings Visitors Views Ads Served $/Impression
Nov 2017  $     5.03 3833 8538 4648  $ 0.00108219
Dec 2017  $   15.18 4344 9732 17369  $ 0.00087397
Jan 2018  $   11.96 4359 9458 17887  $ 0.00066864

WordAds Rate Nov 2017 to Jan 2018

That is a pretty linear drop in dollar-per-impression rate. Perhaps this is due to ad market fluctuations, or maybe WordPress is “incentivizing” increased viewership to maintain ad revenue. Who knows? Either way, it will be interesting to track this trend as time goes on.

Mini-Ramble: WordAds – I think it’s working!

Over a month has passed since my first post about seeing where the WordAds train will take me and my blog, and the first (meaningful) payout numbers have rolled out.

Current Earnings

ss (2018-01-05 at 12.42.57)

WordAds earnings for 1/3 of November 2017, and all of December 2017.

Not too bad – in 1 1/3 months, I’ve earned $20.20 USD in ad revenue. In December alone I earned $15.18 from 17,369 attempted ad impressions; with 9,732 views in December this equates to an impression-to-view ratio of 1.785.

Assuming that I receive the same number of views per month, $15/month * 12 months = $180 USD/year. With this amount of revenue, my blog can finally run itself!

Blog Budget Breakdown (yay, alliteration!)

Item  Value 
Yearly Ad Revenue ($15 USD * 12 months)  $ 180.00
Domain Name Registration (1 year for 3 domains, assuming CAD-to-USD conversion rate of 0.8x)  $  (76.80)
G Suite (1 year, assuming CAD-to-USD conversion rate of 0.8x)  $  (48.00)
Final Balance (USD)  $   55.20

If I assume that my current view count doesn’t change, this would leave me with a little over $50 USD in pocket change by the end of the year. Perhaps this money could be put to use to buy some more things to make blog posts with – maybe some iPhone batteries or an eMMC module or two…

Once again, thanks to all of my readers – I couldn’t have done any of this without you! 😀

Packing Boxes & Stomachs: Edible foam packing peanuts?!

Earlier today I picked up my replacement fire extinguisher from Kidde (check out the recall here) and noticed the packing peanuts weren’t the pearlescent S-shaped Styrofoam peanuts I was used to seeing – rather, they looked like fluffier versions of Cheetos (cheese puffs). This piqued my curiosity… can you eat these?

To see whether these were at least water-soluble, I poured a small amount of water on one of these peanuts, and it dissolved within seconds. Now that I’ve determined that these packing peanuts are indeed the biodegradable type, it’s time to take the taste test…

DSC_2709

A biodegradable (and edible!) foam packing peanut.

… So, how do they taste?

Perhaps surprisingly, they taste faintly of popcorn; I was expecting them to taste more unpleasant like cardboard, but these had a fairly agreeable yet neutral flavour and I suspect that they can be seasoned with a dry popcorn seasoning with little issue, but they may need a light spray of cooking oil in order to make the seasoning adhere to the peanut.

There are multiple manufacturers of biodegradable packing peanuts (one example is Puffy Stuff), and these are made from some form of starch like corn. However, these packing peanuts are basically devoid of any significant nutritional value, making them less attractive to animals and/or pests. Reference.com says that they are not manufactured under food-safe conditions, and are therefore not recommended for human consumption.

… I’m still going to eat these anyway. 😛 *crunch munch*

Self-discharge test of Kentli PH5 1.5V Li-ion AA (Part 5)

It’s amazing – 894 days (and counting) have elapsed since the start of my long-term experiment, documenting the real-world self-discharge behavior of the Kentli 1.5V Li-ion AA battery… and it’s still ongoing! How have things fared so far?

Surprisingly, even after spending nearly 30 months on the shelf, there is still 12% capacity left. The voltage has dropped from 4.216 to 3.692 volts according to my bq27621 Li-ion fuel gauge; the State of Charge (SoC) has dropped 50% since my last update.

november 28 2017 stats

The linear end date prediction is holding pretty steady, having changed slightly to an estimated 0% charge date somewhere in February 2018.

On that note, I’m impressed by how much attention this little battery has received, even years after my initial review. Every day I see a handful of views checking out the teardown and performance metrics, and there seems to be hardly any sign that this will change anytime soon. To everyone who stops by to check out my blog posts: thank you! 🙂

Mini-Ramble: So… WordAds!

I’ve finally done it – I took the plunge and tried to find out if I can enable advertisements on my blog (*gasp*) through the WordAds program – and as it turns out, yes!

Given what I’ve seen online, WordPress has always been vague on one of their acceptance criteria: views per month. They state on their own FAQ that they require “thousands of pageviews each month to earn meaningful revenue”. There were no clear answers from other bloggers either. In my case, I’ve had a paltry 8,000 views/month on average ever since I registered my domain, ripitapart.com (I had over 10,000 views/month when I was using the free WordPress domain). Given that I tend to blog about relatively niche topics (who really cares about battery fuel gauges, anyway?), this is not particularly unexpected; this isn’t helped by the fact I haven’t been posting frequently as of late (so far I have dozens of draft posts, with some that probably won’t be completed as they have essentially gone ‘stale’).

Application for WordAds

I submitted an application request for the WordAds program on November 20, 2017. Immediately after filling out the form I was given an automated message that I was initially declined due to insufficient viewership (but they would keep my request open until I had achieved enough page views per month). However, the next morning I awoke to an email that read “Welcome to WordAds!” – a pretty nice way to start the day. I’m guessing that the number of outstanding applicants were low, and that my content is original enough to warrant acceptance into the WordAds program. Perhaps there is a manual component to reviewing these applications?

So, what about earnings?

Given that it hasn’t even been a week since I was accepted into WordAds, it’s far too early to say how much I’ll actually get out of these advertisements; on that note, since I use WordPress’ Free plan/tier, there were always advertisements on my site (I didn’t get any revenue from those ads, however). Given how most people likely use an ad blocker (myself included), this will further reduce the amount of revenue I can generate from this blog. WordAds will only pay out advertisement revenue when earnings accumulate past $100, which means I won’t actually receive anything until that point… and who knows how long that will be.

Unlike other advertisement platforms, I do not get real-time analytics of ad traffic, and statistics for the month are only updated near the end of the next month (in my case, this means I will not see any information on November’s earnings until the end of December). One common complaint about WordAds is the lack of customization for ads that will be shown; on the flip side, the advertisement system does all the back-end work so I don’t need to lift a finger in that regard.

Your thoughts?

This is the first time I’ve ever tried online traffic advertisements and site monetization, so saying I’m inexperienced in this field is a bit of an understatement. However, I’m curious as to where this will go, and how this will affect my reader base.

What’s your experience with ads on my blog? I’d love to hear your comments on it, especially as time goes on.

Domain Get… again!

Another domain? You betcha!

My blog is now also accessible at http://jasongin.com. There isn’t any real different content if you follow the link; it just links to my normal domain at http://ripitapart.com.

But why another domain?

In a nutshell, it’s for the ability to register a more professional email address for work-related use (think resumes and so on). Coupled with WordPress G Suite integration, this allows me to easily create an email address that is truly unique (since a similarly named Gmail address has already been taken 😛 ).

The cost isn’t too high, about $100 CAD for a year’s worth in subscription fees.

Now, for formal communication, I am reachable at jason.gin@jasongin.com but any other conversation should be directed towards my personal email, ginbot86@gmail.com.

Ramble/WordPress auto-post time: 2015 in review

The WordPress.com stats helper monkeys prepared a 2015 annual report for this blog.

Here’s an excerpt:

The Louvre Museum has 8.5 million visitors per year. This blog was viewed about 120,000 times in 2015. If it were an exhibit at the Louvre Museum, it would take about 5 days for that many people to see it.

Click here to see the complete report.

Self-discharge test of Kentli PH5 1.5V Li-ion AA (Part 1)

As an extension to my previous performance analysis of Kentli’s PH5 Li-ion AA battery, I fully charged an unused PH5 and left it on my desk to self-discharge. Every now and then, a Texas Instruments bq27621-G1 fuel gauge is hooked up to the Li-ion battery terminals (in the case of the PH5, the recessed ring around the 1.5V terminal) and the bq27621’s default settings are used to measure the voltage and state of charge.

I started this test on June 18th, 2015 and will keep taking occasional measurements until the protection IC in the PH5 shuts down.

Since the 18th, the voltage dropped from 4.216 volts down to 4.192 volts as of July 6, 2015; the bq27621’s State of Charge reading remains at 100% for the time being. The voltage drop has been fairly linear so far, but I expect it to taper off as the battery discharges to the Li-ion cell’s “flat region”, and only after that do I expect the cell’s voltage to decline more rapidly.

Ramble/WordPress auto-post time: 2014 in review

The WordPress.com stats helper monkeys prepared a 2014 annual report for this blog.

Here’s an excerpt:

Madison Square Garden can seat 20,000 people for a concert. This blog was viewed about 66,000 times in 2014. If it were a concert at Madison Square Garden, it would take about 3 sold-out performances for that many people to see it.

Click here to see the complete report.

Ramble: Flappy Bird crash investigation

Although it’s already been pulled off the iOS App Store and the Google Play Store, I managed to get a copy of the .apk file and decided to play it on my phone. Seeing others’ experiences along with my own, I noticed there is a pattern to how the annoying little birds fly and crash.

Bird-control theory

The bird is controlled by tapping the screen, which causes the bird to move upward shortly before falling down again. Unlike other similar games, the screen needs to be periodically tapped to keep the bird in the air. This is basically pulse-density modulation at work; each tap of the screen causes a rise of a fixed amplitude and duration.

After playing over 200 rounds, I tabulated the data in a giant Excel spreadsheet, documenting the score along with how and where the bird crashed. With this data, I created a bunch of charts showing how and where crashes occur.

Charts

scorescrash typecrash locationscrash proximityBreakdown

From what I’ve collected, the majority of crashes are overshoots (the bird flies too high and hits the pipe), hitting the top pipe either to the left side or in the center. This can be attributed to the bird’s behavior when flying. When the screen is tapped, the bird moves a certain distance upwards but cannot be controlled. If the bird is too close to the pipe, an overshoot will occur and crash the bird.

I created a bunch of statistics in the spreadsheet outlining the most common crash IDs (explained in the picture) and score information (my highest was 34 🙂 )

statsWas this a good way to cure boredom? Probably, but also possibly a bit too much work given the premise of this game.

If you want a copy of the Excel spreadsheet, click the link below.

Flappy Bird Crash Data

Looking inside an iPhone 4/4S battery

A classmate of mine had a couple broken iPhones that he ‘relieved’ of their batteries and let me take a look at them. Being the curious type I peeled away the outer layers of tape to reveal the protection circuit. I spotted a current sense resistor, and  that got me thinking…

… can it be? Yes, I found a bq27541 fuel gauge chip inside the battery! After fooling around with the battery, I found out that the battery is using the HDQ interface.

iphone battery pinoutThe HDQ bus, which stands for ‘High-speed Data Queue’, is a single-wire communications bus used by TI fuel gauges. It’s similar to Maxim’s 1-Wire protocol but runs with different protocols and timing. It operates at 7 kilobits per second (so much for ‘high speed’ right? 😛 ) and a refresh of the data memory in the TI software can take almost half a minute. However, it’s good enough for occasional polling (like every minute or so) since it’s unlikely that the gauge will be read from every second.

The bq27541(labeled BQ 7541) in the iPhone battery runs an unusual firmware version. It’s running version 1.35 and doesn’t match with any release on TI’s website. The gas gauge is sealed so initially it seems like gaining access to the Data Flash memory would be impossible. However, in non-Apple fashion, the gauge’s passwords are left at the default; 0x36720414 and 0xFFFFFFFF for the unseal and full-access keys, respectively (and it’s not the first time Apple’s done this!). Since the firmware version is unknown, I told bqEVSW to treat the chip as if it were the bq27541-V200. I then saved only the calibration, capacity, resistance and lifetime data.

Updating the firmware over HDQ was a nightmare. It took over a dozen tries for each of the two batteries I had, and the update process took 45 minutes (!) to update the bq27541 to the V200 firmware. At one point, it seemed as if I bricked the chip, but a power-on reset of the chip by shorting the cell very quickly 😀 sent the device into ROM mode (ie. firmware-update mode). From there I used bqCONFIG to update the firmware, and it was successful! Now I could use GaugeStudio to interface with the gauge rather than the unsightly bqEVSW software.

bq27541 updated to version 2.00

bq27541 updated to version 2.00

Given how long it took for me to update the firmware of the gauge, I have doubts that iPhones will update their batteries’ firmware in-system. Hell, the iPhone OS ignores the bq27541’s State of Charge readings and substitutes its own. Nice going, Apple!

Now to start going through cell phone recycling bins to pull out dead iPhone batteries for their gauges…

Tearing down and analyzing a cheap-ass “Xtreme” $3.50 external phone battery

I was shopping around at this electronics liquidation store and stumbled upon a couple cheap buys: A “1900 mAh” external phone battery and another 4400 mAh pack (which will be the subject of another post and teardown). The batteries were originally priced at $7 and $38 respectively, but they were on sale at half price. For $3.50, I was curious enough about the 1900 mAh battery’s real capacity that I bought it anyway, expecting to be disappointed.

The pack itself is roughly half the size of a typical smartphone and about 1.5 times thicker. The casing itself has no screws; the manufacturer decided it was too expensive to use screws so they simply ultrasonic-welded the case shut. After about half an hour with a plastic spudger tool, I was able to crack the case open.

2014-01-05 00.11.26The soldering quality, surprisingly, is pretty good for a sub-$10 device, save for a bunch of hand-soldered components with flux residue left behind. The circuit board is made up of a battery protection circuit (yes, they actually put one in!), an ME2108A-50 boost converter,  something I’d assume to be a charging circuit, and an LM324 op-amp as a “gas gauge” (if you could even call it that!).

2014-01-05 00.11.36The cell appears to be a thicker version of a typical cell phone battery. It’s similar in size to something like a Nokia BL-5C which is a 1020 mAh cell, and is 5.6 mm thick. The cell in the charger is 7.7 mm thick. The charger’s cell is only 37.5% thicker but should have 190% of the capacity… yeah, no. This is not going to be very promising, given how the spot-welded nickel strips literally fell off the cell when I tried to desolder it from the PCB.

After soldering some 20-gauge solid wire to the terminals and hooking it up to a bq27425-G2A fuel gauge chip, I noticed that it reported that the fully-charged voltage is 4.25 volts. This charger tries to squeeze the most out of the cell by overcharging it! Granted, a Li-Ion cell’s maximum terminal voltage is 4.25 volts but it shouldn’t settle down to this voltage after charging!

1900 mah charger overvoltageAfter performing a few learning cycles to determine capacity and resistance, the cell holds merely 1370 mAh. The internal resistance is about 85 milliohms, which tells me that at least they used a relatively fresh cell in this charger and not just some recycled cell (*cough* UltraFire *cough*).

1900 mah charger graphI knew from the get-go that this battery was going to be a let-down, and I was right. But hey, for $3.50 I get a half-decent 1370 mAh cell and a few scrap chips (no way I’m reusing that battery’s PCB as-is!). But my verdict: Avoid this battery pack if you intend to use it to, I dunno, charge your phone. 😛

Skin-Deep Authenticity: Tearing down a “genuine fake” Samsung Galaxy S II battery

When you have the same smartphone for almost 3 years, it’s likely that your original battery’s not going to last as long as the service contract. And as long as you’re not an iPhone user you will probably look into a replacement or spare battery.

coverMy first replacement cell was a 2-pack of “1800 mAh” batteries for $5. These had 66% of the stated capacity and TI’s Impedance Track gauge said that the DC internal resistance was about 250 milliOhms. That’s… pretty terrible. Those two cells quickly led their end in a battery recycling bin. My next two were “genuine” cells from eBay. They cost about $12 each and had rather authentic-looking labels on them too. Their performance was pretty good, but one of them became all bloated so I decided I’d take a look at the cell that’s inside. I peeled off the label, and the truth comes out…

2014-01-01 04.53.39This battery was an outright lie in terms of capacity! 1350 mAh is about 80% of the 1650 mAh capacity that was written on the outer label. The cell’s manufacturer is unknown, but the battery markings read “BMW-524655AR 1350mAh 2012.09.03.1110”. Wait, look at that manufacturer date. Something’s fishy…

2014-01-01 04.53.54The outer label states a manufacture date of July 20, 2012. The internal cell states one of September 3, 2012. Unless this battery was manufactured in a time-bending factory, then these batteries certainly aren’t genuine.

Next up was the protection circuit. The “genuine fake” battery uses a DW01 protection IC and uses a generic 8205A dual NFET for swiching. And there wasn’t even a thermistor; the PCB uses a 1.5k ohm resistor to simulate one. A genuine board uses a single SMD package that integrates the FETs and the protection IC.

Below is a comparison of the protection board of a fake battery and a “genuine fake” one. At least the “genuine fake” uses the same black appearance of the original.

The “genuine fake” battery, after only 2 months of usage (not even 20 charge cycles’ worth), became so swollen that I can’t keep the back cover on. Running this battery through a bq27425-G2A battery gas gauge determined that the real capacity of the battery is a paltry 944 mAh, with an average internal resistance of 187 milliOhms. Absolutely pathetic.

samsung galaxy s ii replacement battery old ra graphGoes to show you get what you pay for. But some things may be more deceiving than others…

Using a laptop battery to power lighter-socket devices

Laptop batteries can be a rather handy source of power, even if it’s not being used in a laptop computer. I built an adapter that converts the knife-blade connector that a laptop battery uses to a car lighter socket.

2013-12-24 02.02.02The connections are made by taking the blades of an ATO or ATC (regular size) car fuse, soldering them to some 16-gauge speaker wire, then soldering the other end to an inexpensive DC lighter socket.

2013-12-24 02.05.39This setup is only good for roughly 5 amps (the overcurrent protection on this battery is set to 6 amps) and the voltage near the end of discharge can be too low for certain devices; power inverters will stop at about 10 to 11 volts which leaves a small amount of battery capacity unused.

Mini-Ramble: I’m such an icon artist!

After working so much with these battery chips, I thought I should spice up the Windows file icon for the .gg files that clutter my documents folder.

I’m not a person for glossy icons, but I’m also not a fan of the super-flat colour scheme that the Windows Metro UI uses. I prefer the good old style of Windows 9x-esque icons (hey, it’s what I grew up on! 🙂 ), albeit with a more… contemporary colour scheme. Keep it simple!

Windows .ico file download: https://www.dropbox.com/s/u7kjb3og7ecvpsj/gas%20gauge%20file.ico

You can use Nirsoft’s FileTypesMan to add an icon in Windows. Personally, I configured it so that .gg files open up in Notepad++ for manual editing.

Update: How to install Windows x64 drivers for the Schlumberger Reflex USB smart card reader

Update (December 11, 2017): For those on Windows 10, click HERE for the SCR300 driver package – digitally signed to ensure compatibility. Extract the files, right-click the appropriate x86/x64 .INF file and select “Install”. Proceed with the installation as shown below.

A viewer requested help on installing the drivers for the Schlumberger Reflex USB smart card reader, so I’ve created a step-by-step instruction guide on doing so.

1. Plug in the smart card reader into an available USB port. Windows should attempt to install a driver but won’t succeed.


2. Open Device Manager, and select the “SLB ReflexUSB SmartCard Reader” in the list.


3. Follow the wizard and opt to install the drivers manually.


4. Enjoy your now-functional smart card reader.


Reverse-engineering the Toshiba Tecra R840’s battery interface… the long way

Since the summer I’ve been all about interfacing with smart batteries. All the laptops I’ve had, I’ve deciphered the pinouts for. However, our college-supplied laptops, the Toshiba Tecra R840, has eluded me for over a year. The IT department didn’t allow me to obtain an old battery pack for disassembly (not like I was expecting them to 🙂 ), so instead I looked at disassembling the laptop to find out the interface. The reason I decided to take apart the laptop as opposed to the battery, is that the laptop is generally able to be taken apart and re-assembled without leaving permanent marks; batteries are often ultrasonically welded and can only be opened with brute force or a hot knife.

Laptop bottom cover removed and powered by battery

Laptop bottom cover removed and powered by battery

After removing many screws and popping the bottom of the laptop apart, I looked to the battery connector to find out the pinout.

Close-up of battery connector

Close-up of battery connector

The PCB had an unpopulated spot for some 3-terminal ESD protection diode, and this was a hint that these two pins were what I was looking for. I soldered some wires to the pins and a third ground wire, and attached them to a pin header. I used a logic analyzer to examine the signals (if any) that passed through the connector.

toshiba battery

Logic analyzer trace of initial battery insertion

And I hit pay dirt, or so I thought. I was able to find out that there indeed was communication between the battery and the laptop. However, the fun ends there. Looking closely at the I2C transactions, I could see that the battery wasn’t speaking the normal SBS (Smart Battery System) protocol. Testing with my Texas Instruments EV2400 confirmed that this isn’t a smart battery. It appears that the battery likely only contains an EEPROM for some battery information storage but lacks any real means of gas gauging. That would probably explain why battery life is abysmal on these machines!

Toshiba battery not detected with smart battery hardware/software

Toshiba battery not detected with smart battery hardware/software

I was able to mostly figure out the pinout for the battery, but what has yet to be seen, is which pins provide power to the EEPROM chip, as it seems that it is not powered internally.

Currently known battery pinout

Currently known battery pinout

Sometime later I’ll have to delve further into the contents of the EEPROM, or try and obtain one of these batteries for disassembly. We’ll just have to see.